Showing posts with label 1947. Show all posts

Friday, January 8, 2021

1947 Velocette MSS. Pretty Pictures of Ugly.

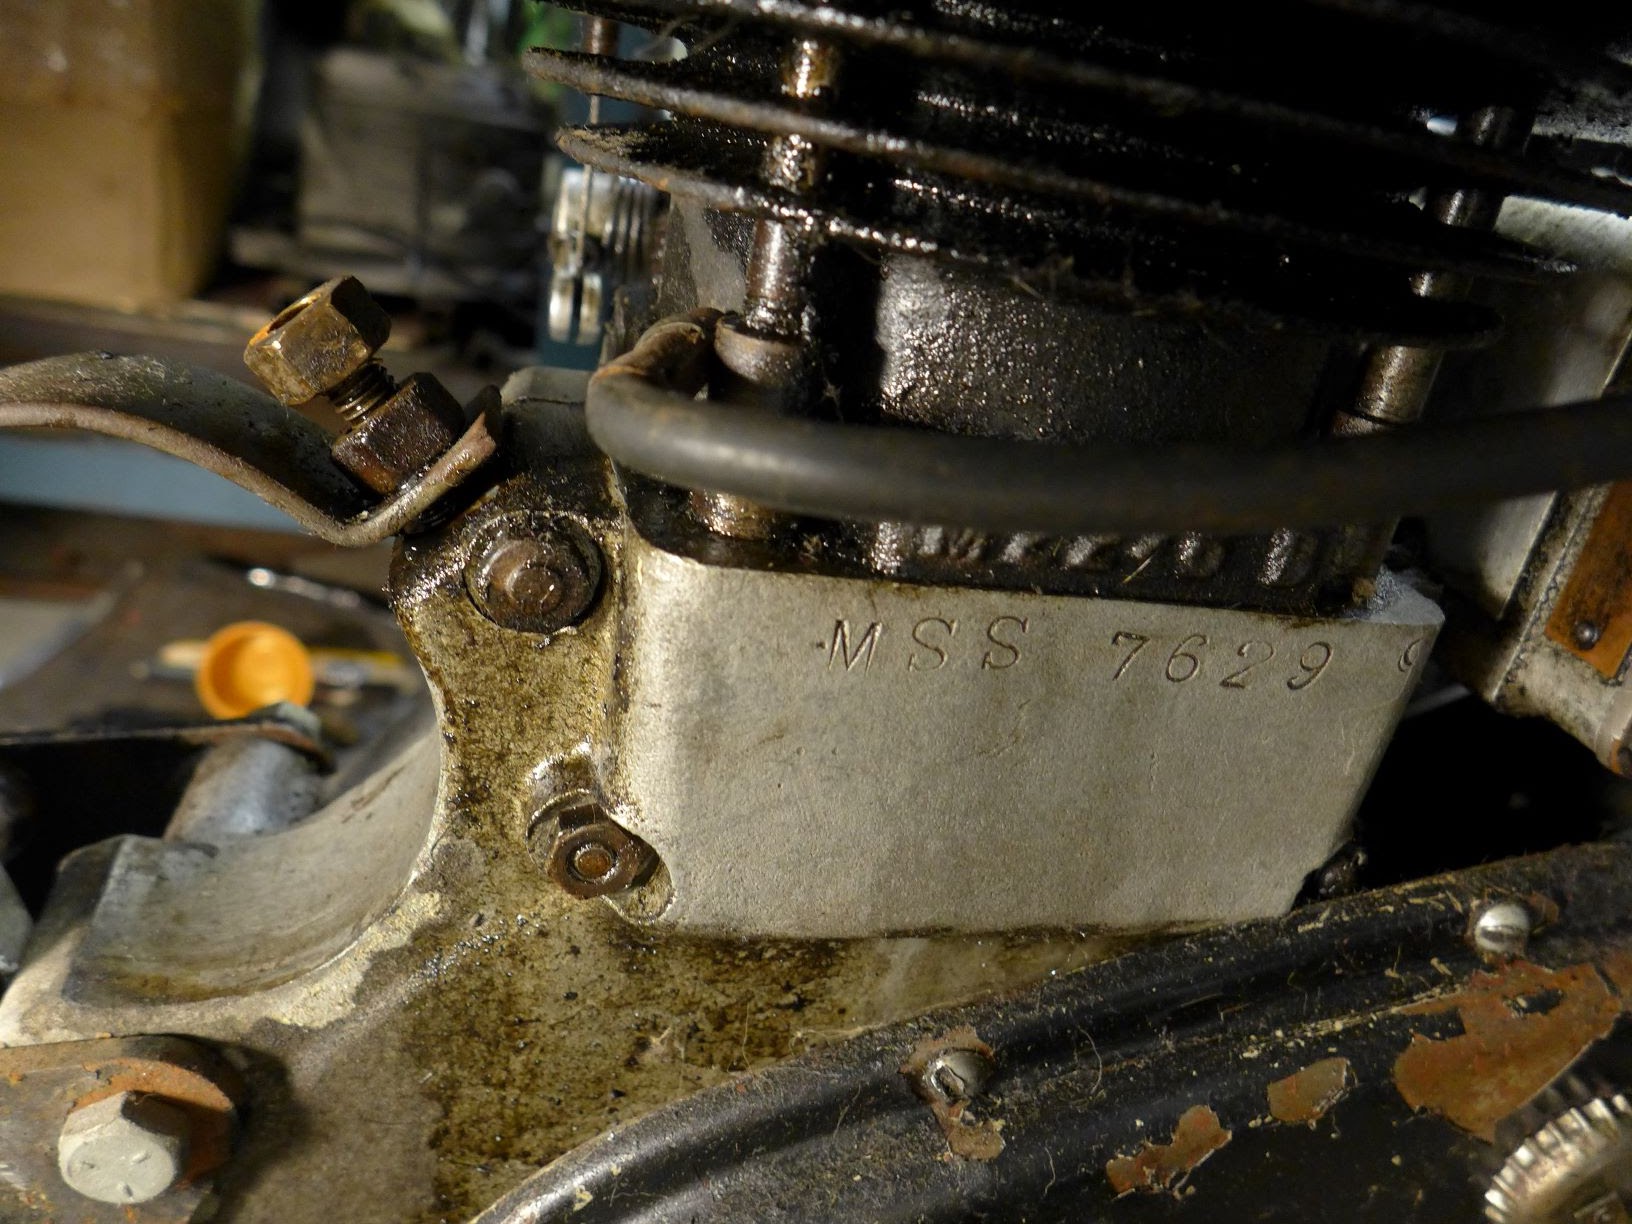
After a conversation with Ed G, I got out the old Lumix and shot a few pictures for him of broken up and worn Velocette Bits. Most of the pictures are of the engine out of the 1947 Iron MSS project. Broken barrel and head fins, here and there plus pictures of the rocker box where  oversized bolts were wound in to make their own threads after the old threads gave up the ghost. I bit more patina then one engine should wear? I suppose you could bust off more fins and make it into a full on dope motor...  too bad the flywheels aren't up to that task.
The other set of pictures are the mostly worn out barrel and piston. The barrel is from the alloy MSS engine 10675, the piston is the original out of MSS 13084. Big questions, is there life left.


As said, pretty pictures of ugly.


Monday, December 7, 2020

Snow interferes with frame, other chores abound...

 Monday was the scheduled date to bring the 47 MSS frame down to CT for a eyeball of having a local shop fix it up. A few things popped up within that time. The first, it didn't look to be a cut and dry repair; the frame was tweaked. The second...? a good snow was coming into N.E. the same day.  Everything was ready the night before: got the frame loaded, and gassed the old 'wagen for the run. The first leg of the drive was mostly rain but this slowed as I got deeper into CT.

Got to the shop ok, we all check into different approaches to its repair. The twist in the steering head added to a slight complication. The best thought was to replace the down tube and go from there. After gasbagging for a bit and admiring all the pretty machines it was time to head back before the real storm hit. However, right out the door the snow was well on and the 'wagen fully covered and smogged up. It was going to be a typical 'first storm' drive back. One hour down and almost two hours back. Ugh, the worst was being trapped behind a FedEx truck doing 15mph on the flats and 5mph down the hills. This really took the wind out of my sails. Most people were driving as typical New England drivers did; most 5 under the speed limit with the exceptional fly by boys. One fly by was quite the spectacle; blew past the group of drivers on the interstate at plus 35. He was arse backed into a ditch the wrong way with one wheel off the ground shortly there after. I'd feel the fool to be that dude. Made it back into town ok, the 'wagen did as it always does; gets where you need to go. A lot of use of the old gearbox, not much use of the brakes.

The slush covered road back home

Back home, snow storms means cooking dinner out on the grill; always an enjoyable way to pass any type of storm. On this round the power when out for about three hours. No worries while grilling.

The next day was spent clearing the slushy frozen ice/snow mixture from walkways and the drive. While at the bike shop we talked about frame jigs for straightening out the tweaked frame. As I slugged it out scraping up sheets of ice from the driveway it occurred to me that I've a pile of steel collected from a fire escape someone was throwing away. Maybe this could be re purposed? Thoughts to ponder...


The frame as it awaits the next step towards repair
Today my attentions were spent on working with Yucca trees in the solarium and the non functional kitchen vent fan. The trees started with a single tree in 1980 and have grown to about twenty now, some as tall as 6 feet. Its time to cut them back and get back some room to enjoy the sun on that odd winter day. 


After about an hour sitting in the sun thinking about what to do with the trees, no extra motivation soaked into my head as to where to start; so on to the next chore of fixing the kitchen range hood fan. It been acting up for the past few months. You'd start it up, it'd run for awhile then shut down. Back and forth this dance we did until it just wouldn't fire off at all. Except it would run if the whole stove kicked up enough heat to set off an internal thermo switch. At that point, the fan would work fine until it cooled down. Bugger.


After a healthy dissection of the beast I arrived at the main control unit. I pulled the board out and tested it to the best of my abilities; check this, check that, test, test, test. I even de-solder components to isolate circuits. In the end I did what I really wanted to  and wanted all along; I bypassed the control board and put a switch between the power and feed wires off the board. Now one push of a button turns the fan and lights on full. That's all I need. On to the next...

Thursday, December 3, 2020

Down to the frame

    Since the local shop side they'd could look  at the frame on this coming Saturday, I tore into what was left on the old MSS. I suspect that when they look at it, they may change their minds. Its definitely bent or twisted to one side.  However, nothing ventured- nothing gained. I'm not too sure they're equipped for frame straightening. It wasn't a thought to me that it could be bent, so I never asked. Its certainly clear now with so much off the frame. Both the top and down tube have issues; the down tube the most with two cracks and bodge repair.  

    With the engine and gearbox out last night, it was down to the last chore of pulling the rear wheel, fender, front wheel and forks. Most everything went according to Hoyle except the rear axel. At first it didn't want to come out of the wheel, then it didn't want to go back in. The nut that secures the left side hub/brake plate didn't want to budge until the axel was back in an tightened. The wheel nuts posed no troubles, though I expected they would. After a short dance all was released and off the frame. Exposing decades of road grime and grease inside the fender. If its anything like the front fender I'll gain 2 horsepower after removing the 12 pounds of dirt. 

using the 'add a' wrench to pry the axel out; pry a little, add a wrench.

missing parts and munged up threads? no surprise there...

looking to recover extra horse power after cleaning.

broken bolt or stud? you decide.

The Dowty forks came off without much trouble and no spilt oil. They were easy, in a relative way; support the frame, let out the air pressure, take out the two fill plugs and the center stem nut, pull up the upper triple, catch all the ball bearings from the head races.  I did have the fore thought to have a place to hang the forks while the caps were off and no way for air pressure. After which I reinstalled the upper triple, the fill caps and then pumped up the forks.  With a little luck they'll stay pumped up and not leak, Ha!.

So now its a bare frame ready to be brought back to a functional state.


Digging into the 47 Velocette

    After looking at the progress on the MSS from last night, I figured to keep in the mode of moving forward. So the game plan is to tear everything off the frame in preparation to repair the cracked down tube. One thing that had been bothering me is a previous repair bulge/bodge.
    Around noon time I called a local shop to see if they might be able to weld the frame; just clean it up and bring it down they said. They've been doing British bike repairs since the 80's, maybe even earlier. At the very least it would be a good thought to hear their thoughts on the frame. However, by the end of this post you'll find that it might need more than just a weld.
    Before getting a full on, stuck in today; I also gave Ed G. a call for inspiration. Kinda like a double espresso shot to give you that extra motivation. Everything looks easy until you begin to overthink it. And with everything this old machine has to offer, the education is boundless for me to overthink.  We talked about parts and cost; cost being a big issue for me, but getting the Velo on the road and out of Ebay is more important. Plus, I'd feel like a real heel selling this machine to someone that has eyes for it but no real knowledge of getting it back to health. 
    Generally I'd rather ride a bike than repair it. Wouldn't we all? However having some skills and a few tools to tackle most minor machine ills can allow for a lower buy-in budget to experience. This machine is beyond the tipping point; the full on challenge of repair. All of this will give me more skills to build a racer in the future anyways. 
    Am I up to cutting out and braising in new tubes? I've never braised, but I do have a torch set. So where do we go?  If the road goes in the right direction I like to be more in tune with these older machines. A self sustaining process; able to keep it going. Its not a restoration but a means of keeping it working in a tidy manner. Back to a zen state if you will, maybe even a metaphysical thought process. If you know it inside out how can it let you down? Its difficult when you let the machine psyche you out. 

So the first port of call was to use some 5f5 paint stripper on the previous repair. No need to be worried about the concours paint. Seeing what was done would help direct some ideas as to which way the down tube needs attention. After a few applications of stripper, it was evident this was a true bodge to keep it running. It looked as if it had a strip of metal to blanket over the welded section adding some support where there was a previous crack right under that casting.  Cleaning the welding off the old tank casting will prove to be challenging. Ed G. mention several different ways to tackle this; cut the old casting in sections and  un-braise it or in extreme cases, fabricate a new set of mounts out of tubing. After looking, I'm leaning towards fabrication of a new unit.


So clearly there is a problem with the whole down tube. As things progressed in the teardown, I find that the frame is also bent off to the left a fair bit too. But before anything can be done, the engine and gearbox need to come out. So onward ho! Most of the removal is straight forwards, generator off, oil tank off battery tray and the like. Keeping track of the bolts slows things down now but will speed things up later. Usually I will put the bolts back into the plates or locations they came from. Better still is wired  onto a section of cardboard in which I've drawn or cutout the shape of the location. This works best when removing covers of any sort. A good thick piece of cardboard will last many uses. 
The modified generator strap, not factory.

Does this qualify as "safety" wire?
        While preparing to remove the primary case I recalled Ed mentioning to me in past conversations about the early frames and the foot peg lugs can be problematic. All the primary cover screws were accessible except for one. So maybe the primary stays on while the engine/ gearbox assembly.? At about this point I needed to give Ed another call for advice. Hopefully he doesn't have a punch clock near his phone! Ed had a trick that allows you to wiggle it all out; loosen the rear engine plates from the transmission and remove the rocker adjuster covers. I opted to remove the rocker box altogether after loosening the plate bolts. 
    As a note, the engine/ gearbox is heavy! I found holding it from the magneto body and the cylinder afforded the best leverage. But its no light weight. With the engine out, its clear to see that the frame is bent. More chores to figure out. 


I've added a few pictures of the MSS numbers; frame, gearbox and engine just for curiosity sake. Its hard to see the frame number KDD 9940. On to tomorrows task to strip the forks and wheels.