Friday, December 30, 2022

1970 Velocette Thruxton recommissioning

 Yesterday found me resetting and checking cam timing the Thruxton engine. I began this the day before but found that there was not enough clearance to set the specified gaps for both the intake and exhaust as specified in my manuals. [Haynes Workshop manual-BMS Service Series book- and Reliable Service Manual ]

Since the engine was partially disassembled before it arrived here in the shop; the previous owner had removed the distributor, rockers and pushrods. I couldn't be certain as to whether parts in boxes were from this engine or spares. Once the rockers and pushrods were in place it was evident that you could not set the needed 0.053" gap on the inlet and 0.052" for the exhaust for checking cam timing.  The foot of the adjuster side of the rocker was fouling the pushrods.

[NOTE to keep in mind:  on this Thruxton the cam is a M17/8 and uses the 0.053" intake and 0.052" exhaust for gaps when timing the cam.  The M17/7 which is found on Vipers and MSS models and possibly others will want the gap set at 0.030"  for both the intake and exhaust.  As you read on further, all my comments will relate to the M17/8 cam with quieting ramps. Hence taking a few times to measure it again and again. The most important of all the measurements will be the opening of the intake]

Observations? The pushrods might not be from this engine, the cam followers might not be from this engine, the rocker foot that presses on the valve stem looked to be almost unworn. Maybe the rockers had been replaced? And from there, maybe the valves had been replaced; they looked good and not recessed in the heads. Perhaps the valve stems are taller than what is standard? Knowing that people make their own pushrods for Thruxton engines I thought about shortening them.  Before anything though, I gave Ed G. a call incase I was overlooking something. 

Sadly, Ed wasn't feeling well, but we did come to few thoughts; the first was whether the the engine height had changed. Since I was reusing the two compression plates and replaced the two paper gaskets, I was confident that had not changed. The head gasket was replaced but was not thinner than the head gasket that came out. Ed suggested to use two head gaskets for setting the cam timing, then remove the added gasket after setting the cam; but noted this a pain as you have to assemble/disassemble more times.  The thought to shorten the pushrods was passed on; not quite as a straight forward process to do.  Removing some material from the rocker where it was fouling the pushrod seemed to be a logical solution and would not affect the overall mechanics.

cam follower feet examples

cam follower feet examples

cam follower feet examples

cam follower feet examples

cam follower feet examples

At this point we go back to the old hand built brit bike mantra; Put it together-take it apart-put it together-take it apart-put it together-take it apart-put it together-take it apart-put it together-take it apart. After several passes between small grinding sessions and reinstalling the rocker box, we had success and were able to set the rockers to the 0.053"intake and 0.052exhaust! On to timing the cam.


The last time I did the cam timing was on the MSS engine. At first, it all reads to be confusing; use a timing disk, set TDC by the positive stop method, removed the exhaust pushrod, set the intake at 0.053" then read degrees at which point the intake closes and opens. Now do the same for the exhaust but set to 0.052". However, if there are no marks on the timing gears where to start?  Again, I'm thankful that Ed had an answer for that too!

Setting and checking the gap on the exhaust for cam timing

 What Ed had told me was simple, elegant and and easy to remember.  The most important to set is the intake opening, since the cam is one piece both intake and exhaust lobes are 'timed' to each other. Set the 0.053" gap on the intake, remove the intermediate gear and the exhaust pushrod. Set the crankshaft position to the indicated degree you want the intake to begin opening.  In this case, I want the intake to open begin opening at 45` BTDC [M17/8 cam timing;  45`/55`/65`/35`]. With the gap set and the crankshaft set, rotate the cam  clockwise until the foot is pressing on the intake rocker foot and no up and down play can be felt in push rod tube. Hold this firmly and without moving the crankshaft, install the intermediate gear back in, you might need to SLIGHTLY rotate the crankshaft to get it to mesh. Now double check everything to triple check; I tend forget which direction the crankshaft/gears/ magneto are rotating even with notes. With a little bit of luck you'll be really close to the ballpark. I'll go through the process several times triple checking everything and even then not be satisfied I've done it right though my measurements come out ok.

Once satisfied with your results, you can move on to timing the magneto to 38* BTDC. This was it's typical fiddly job. Set the degree a hair before 38*, move the points until they are about to open, backup a touch, tighten the nut on the timing gear and check to see where its opening. Keep your special timing gear puller nearby as most of the time its not spot on the first few tries. 


Time to take a break and call it a night.  We'll double check everything in the AM...

Thursday, December 22, 2022

1970 Velocette Thruxton recommissioning

 
I stole away a few moments this evening to make some progress to the Velo before the holiday consumes any free time. From the last shop time, the next chore was to install the piston and barrel.  It could have been done shortly after I received circlips from Ed G at the Toyshop West, but I didn't want to miss any subtle details in the assembly.  
Here is a quick video with some of the process put the top end back on the Velo. Not the greatest video work, but better than nothing.

Here are a few more pictures...


One piece push rod tube with o-ring

Using magic marker for push rod identification


Next step will be to degrease the rocker box gasket surface and get the rocker box done up. 


Wednesday, December 14, 2022

1970 Velocette Thruxton recommissioning


 Received some gaskets, circlips and stainless washers this week from Ed G at the toy shop! Currently it's cold here and more snow seems to be on the way. So when time permits, I'll retreat to the workshop and get back into putting the top end on the Thruxton.    It's been a touch hectic between the November/December holidays, but isn't that always the case? We'll try to keep posting as the mind permits.

Sunday, December 4, 2022

1970 Velocette Thruxton recommissioning

 Got a few more hours to work on the Thruxton today.  There were a couple of things that had caught my attention as I learn about Mark's bike. The crash had damaged the clocks and mounting brackets. Not terrible damage but enough to skew things out of alignment.  The most puzzling thing to approach was the speedometer; one of the mounting bolts had been pushed in, bending the housing in as well.  

My first thought was to sent the speedo out to Joel Levine in Georgia to have the housing fixed. The tach was sitting in a box from him and had paperwork stating that it was repaired and calibrated by in 05'. However, the budget isn't quite able to handle that luxury and with the proper procedure I might be able to get reasonable results.

The first natural thought was to put something on the mounting point stud and bent it back. Meh, yeah, the thought of it snapping off and munging up the threads didn't seem worth it. If it didn't break, it certainly might loosen the stud from the housing and I was fairly confident that the housing would be think enough to resist being bent back in such a short attachment point. Heat was out of the question; so was removing the bezel to access the dent from in side.

The last thought that came to mind was to use the the stud to pull the dent back up and out. Much like the 'weld on' tabs used for dent removal.  After digging though the most accessible thick pieces of small steel sections with pre-drilled holes, I found a small flat prybar with a hole. It seemed reasonably thick enough for the job and just fit within the space of the clockworks mounting screws and it was able to catch the edge of the speedo case. The thought was to use the edge to support the "tool" and draw the dented down bolt up towards the tool.  - nothing ventured, nothing gained?


With a 8mm deep socket and a 1/4inch tee handle, the nut was tightened up and then, tightened some more. It all felt like it was working ok, the final moment was to remember to STOP when it got too tight. NO need to break the dern stud right out. Perfect, it's all worked well enough that it is almost not too noticeable and probably won't bee seen when attached to the brackets.

The second part was to straighten out the mounts for the tach and speedo (also bent). Those took a little more time as the bends went everywhere. The last bit was closing up the angled base to orient the gauges and to get them to lay relatively flat. 


Moving on to the timing chest, I found a few small things to attend to;  one of the push rod tube studs was loose and coming out with the nut, the new timing gear was striking the inside of the engine case and one of the support plate oil jet nuts was fouling the timing cover (testing without a gasket)


The stud was an easy one,  just take it completely out, lock the lower section in a vise with soft jaws so as not to ruin the threads. Take the nut off then double nut it to reinstall in the case.  One more problem solved. The next was to address the timing gear.  This engine came as a coil ignition model and had been retained as such; the coil was still attached to the under tank mounting bracket. However the Lucas distributor had been lost to time and shuffling around. To convert it to manual advance magneto requires a few steps and extra parts.  The distributor style gear did come with the bike but this gear has a reverse taper to that of the manual advance gear. [picture to follow]

With the magneto temporarily installed a test showed that the gear scrapes the inside of the engine case.

Ok, we can fix this, off to the hobby lathe for a little facing.  after a few light passes and some light needle file work, the gear was working out just fine.  The gear also needed a touch of fitting onto the taper of the magneto. Experience from the past told me that if you lap a tapper joint the depth changes. So with only a very fine polish was the taper setup to the point that when you lightly tightened the magneto center nut, the taper would need a puller to remove it. 


While on small tasks, the lower magneto retaining bolt was hard to reach. This is typical on almost all Velos. In the past I've made a few wrenches that worked fairly well. With the Thruxton, the access is hindered by a breather tube just below the mag body. It looked as if you can easily reach (relative) this nut from below the left side of the engine; just about the trans. Fast forward a few hours and presto, a new tool to add to the kit. Made from 3/16" thick 1" stock, the wrench was cut, bent, heated cherry red and dropped into quenching oil.


The rest of the time was spend on reassembling the timing gear and steady plate; checking over anything in this area before the final reassembly.  One issue was that the cover was rocking side to side with a significant gap. Even though I was not using a gasket with this fitting, I expected less of a gap. The nuts that hold the oil jets were a tad proud, holding the cover open. With a little file work and light sanding I reduced the gap, not quite to zero, but close enough that the usual gasket will take up the slack. Next task is to shorten up some socket head bolts to replace the screws normally used to hold the timing cover on.


all for now...

Wednesday, November 30, 2022

The Gathering of the Faithful 2022 / New England Speed Society

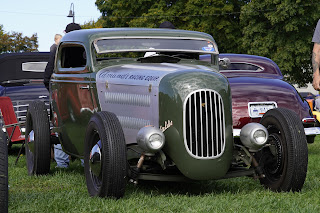
Back on October 15th  I took a trip down to Middleboro MA to the Gathering of the Faithful on the old MSS Velocette and came back with over 500+ pictures (give or take)  of cars and bikes.  Try to keep your calendar open for around this date next year. I'll post a few links for you to keep your eyes open to at the bottom of the page... IN the meantime check out some of these cars shots from the show... I'll add more as time goes on.