Showing posts with label MSS. Show all posts

Friday, February 12, 2021

BLACK COFFEE

Gave Ed G. a call tonight after checking out his revised workshop blog, now called " Black Coffee". While talking about all different aspects of shop life and other things. One subject touched upon was the early MAC and MSS rocker boxes; inside the rocker arm is a thin washer. This washer helps control the level of oil. This washer is held inside via a conical spring. Ed had mention that sometimes people have stretched the spring to add pressure onto the washer.  however, this is a bodge and not a proper fix due to it changing the function of the spring.

Strangely, I never looked much into the rockers when they were disassembled. So a quick dash to the Iron MSS project storage box to check out the rockers. Even more so, I didn't even notice the washer internal of the rocker. Not only that, but the spring in my very much worn out and bodged iron MSS was stretched out to add pressure onto the washer. Always something to learn. Thanks Ed!


Oil control washer removed.

View of a bodged conical spring.


Checkout Ed's blog "Black Coffee at  http://edgilkisonvelocetteworkshop.blogspot.com

Ed's other blog, the inner mechanations of Velocette repairs http://edgilkisonvelocette.blogspot.com


Friday, January 8, 2021

1947 Velocette MSS. Pretty Pictures of Ugly.

After a conversation with Ed G, I got out the old Lumix and shot a few pictures for him of broken up and worn Velocette Bits. Most of the pictures are of the engine out of the 1947 Iron MSS project. Broken barrel and head fins, here and there plus pictures of the rocker box where  oversized bolts were wound in to make their own threads after the old threads gave up the ghost. I bit more patina then one engine should wear? I suppose you could bust off more fins and make it into a full on dope motor...  too bad the flywheels aren't up to that task.
The other set of pictures are the mostly worn out barrel and piston. The barrel is from the alloy MSS engine 10675, the piston is the original out of MSS 13084. Big questions, is there life left.


As said, pretty pictures of ugly.


Sunday, January 3, 2021

Back into shimming the Velocette MSS case

Had another go at shimming up the spare MSS engine last night. Without shims under the race,  I was getting an indication of about 0.006". 


After a bit of quadruple checking it; seems that the next move would be to add one of the shims that came out of it and see what the results will be . Some of the reasons for this whole exercise, apart from the self educational standpoint; this engine had been sitting in a basement for 26 years, the cases had a cork gasket between the halves. As far as I've been told, Velocette didn't seal the case halves with gaskets.

Before getting on with heating up the case I needed to modify the block of aluminum I had cut to fit on the race. It was meant to have a weight on top to hold the race seated, keeping it pushed into the case while it cooled. Rather than a weight, I drilled a hole so it could be bolted up to keep pressure; insuring the race was seated in the case and on the shim. From there, pulled out the burner assembly, set the case half on it and gave it a go.  
While waiting for the the whole lot to cool and settle (I'll check it tomorrow) I took some time to goof with making a few pins that might help with the installation of the oil pump, when that time comes.

Nothing special about them, a section of 3/16" rod threaded on one end and the other a slot cut in case they prove to be difficult to remove after a pump has been installed. whether this idea will work, no idea.  My reasoning was to keep the twisting of the pump to a minimum during installation. Worst case, the pump body could jam on the pins. I did a check in the reverse direction to test the base fitment on the pins with the base alignment to the case.


Thursday, December 3, 2020

Down to the frame

    Since the local shop side they'd could look  at the frame on this coming Saturday, I tore into what was left on the old MSS. I suspect that when they look at it, they may change their minds. Its definitely bent or twisted to one side.  However, nothing ventured- nothing gained. I'm not too sure they're equipped for frame straightening. It wasn't a thought to me that it could be bent, so I never asked. Its certainly clear now with so much off the frame. Both the top and down tube have issues; the down tube the most with two cracks and bodge repair.  

    With the engine and gearbox out last night, it was down to the last chore of pulling the rear wheel, fender, front wheel and forks. Most everything went according to Hoyle except the rear axel. At first it didn't want to come out of the wheel, then it didn't want to go back in. The nut that secures the left side hub/brake plate didn't want to budge until the axel was back in an tightened. The wheel nuts posed no troubles, though I expected they would. After a short dance all was released and off the frame. Exposing decades of road grime and grease inside the fender. If its anything like the front fender I'll gain 2 horsepower after removing the 12 pounds of dirt. 

using the 'add a' wrench to pry the axel out; pry a little, add a wrench.

missing parts and munged up threads? no surprise there...

looking to recover extra horse power after cleaning.

broken bolt or stud? you decide.

The Dowty forks came off without much trouble and no spilt oil. They were easy, in a relative way; support the frame, let out the air pressure, take out the two fill plugs and the center stem nut, pull up the upper triple, catch all the ball bearings from the head races.  I did have the fore thought to have a place to hang the forks while the caps were off and no way for air pressure. After which I reinstalled the upper triple, the fill caps and then pumped up the forks.  With a little luck they'll stay pumped up and not leak, Ha!.

So now its a bare frame ready to be brought back to a functional state.


Digging into the 47 Velocette

    After looking at the progress on the MSS from last night, I figured to keep in the mode of moving forward. So the game plan is to tear everything off the frame in preparation to repair the cracked down tube. One thing that had been bothering me is a previous repair bulge/bodge.
    Around noon time I called a local shop to see if they might be able to weld the frame; just clean it up and bring it down they said. They've been doing British bike repairs since the 80's, maybe even earlier. At the very least it would be a good thought to hear their thoughts on the frame. However, by the end of this post you'll find that it might need more than just a weld.
    Before getting a full on, stuck in today; I also gave Ed G. a call for inspiration. Kinda like a double espresso shot to give you that extra motivation. Everything looks easy until you begin to overthink it. And with everything this old machine has to offer, the education is boundless for me to overthink.  We talked about parts and cost; cost being a big issue for me, but getting the Velo on the road and out of Ebay is more important. Plus, I'd feel like a real heel selling this machine to someone that has eyes for it but no real knowledge of getting it back to health. 
    Generally I'd rather ride a bike than repair it. Wouldn't we all? However having some skills and a few tools to tackle most minor machine ills can allow for a lower buy-in budget to experience. This machine is beyond the tipping point; the full on challenge of repair. All of this will give me more skills to build a racer in the future anyways. 
    Am I up to cutting out and braising in new tubes? I've never braised, but I do have a torch set. So where do we go?  If the road goes in the right direction I like to be more in tune with these older machines. A self sustaining process; able to keep it going. Its not a restoration but a means of keeping it working in a tidy manner. Back to a zen state if you will, maybe even a metaphysical thought process. If you know it inside out how can it let you down? Its difficult when you let the machine psyche you out. 

So the first port of call was to use some 5f5 paint stripper on the previous repair. No need to be worried about the concours paint. Seeing what was done would help direct some ideas as to which way the down tube needs attention. After a few applications of stripper, it was evident this was a true bodge to keep it running. It looked as if it had a strip of metal to blanket over the welded section adding some support where there was a previous crack right under that casting.  Cleaning the welding off the old tank casting will prove to be challenging. Ed G. mention several different ways to tackle this; cut the old casting in sections and  un-braise it or in extreme cases, fabricate a new set of mounts out of tubing. After looking, I'm leaning towards fabrication of a new unit.


So clearly there is a problem with the whole down tube. As things progressed in the teardown, I find that the frame is also bent off to the left a fair bit too. But before anything can be done, the engine and gearbox need to come out. So onward ho! Most of the removal is straight forwards, generator off, oil tank off battery tray and the like. Keeping track of the bolts slows things down now but will speed things up later. Usually I will put the bolts back into the plates or locations they came from. Better still is wired  onto a section of cardboard in which I've drawn or cutout the shape of the location. This works best when removing covers of any sort. A good thick piece of cardboard will last many uses. 
The modified generator strap, not factory.

Does this qualify as "safety" wire?
        While preparing to remove the primary case I recalled Ed mentioning to me in past conversations about the early frames and the foot peg lugs can be problematic. All the primary cover screws were accessible except for one. So maybe the primary stays on while the engine/ gearbox assembly.? At about this point I needed to give Ed another call for advice. Hopefully he doesn't have a punch clock near his phone! Ed had a trick that allows you to wiggle it all out; loosen the rear engine plates from the transmission and remove the rocker adjuster covers. I opted to remove the rocker box altogether after loosening the plate bolts. 
    As a note, the engine/ gearbox is heavy! I found holding it from the magneto body and the cylinder afforded the best leverage. But its no light weight. With the engine out, its clear to see that the frame is bent. More chores to figure out. 


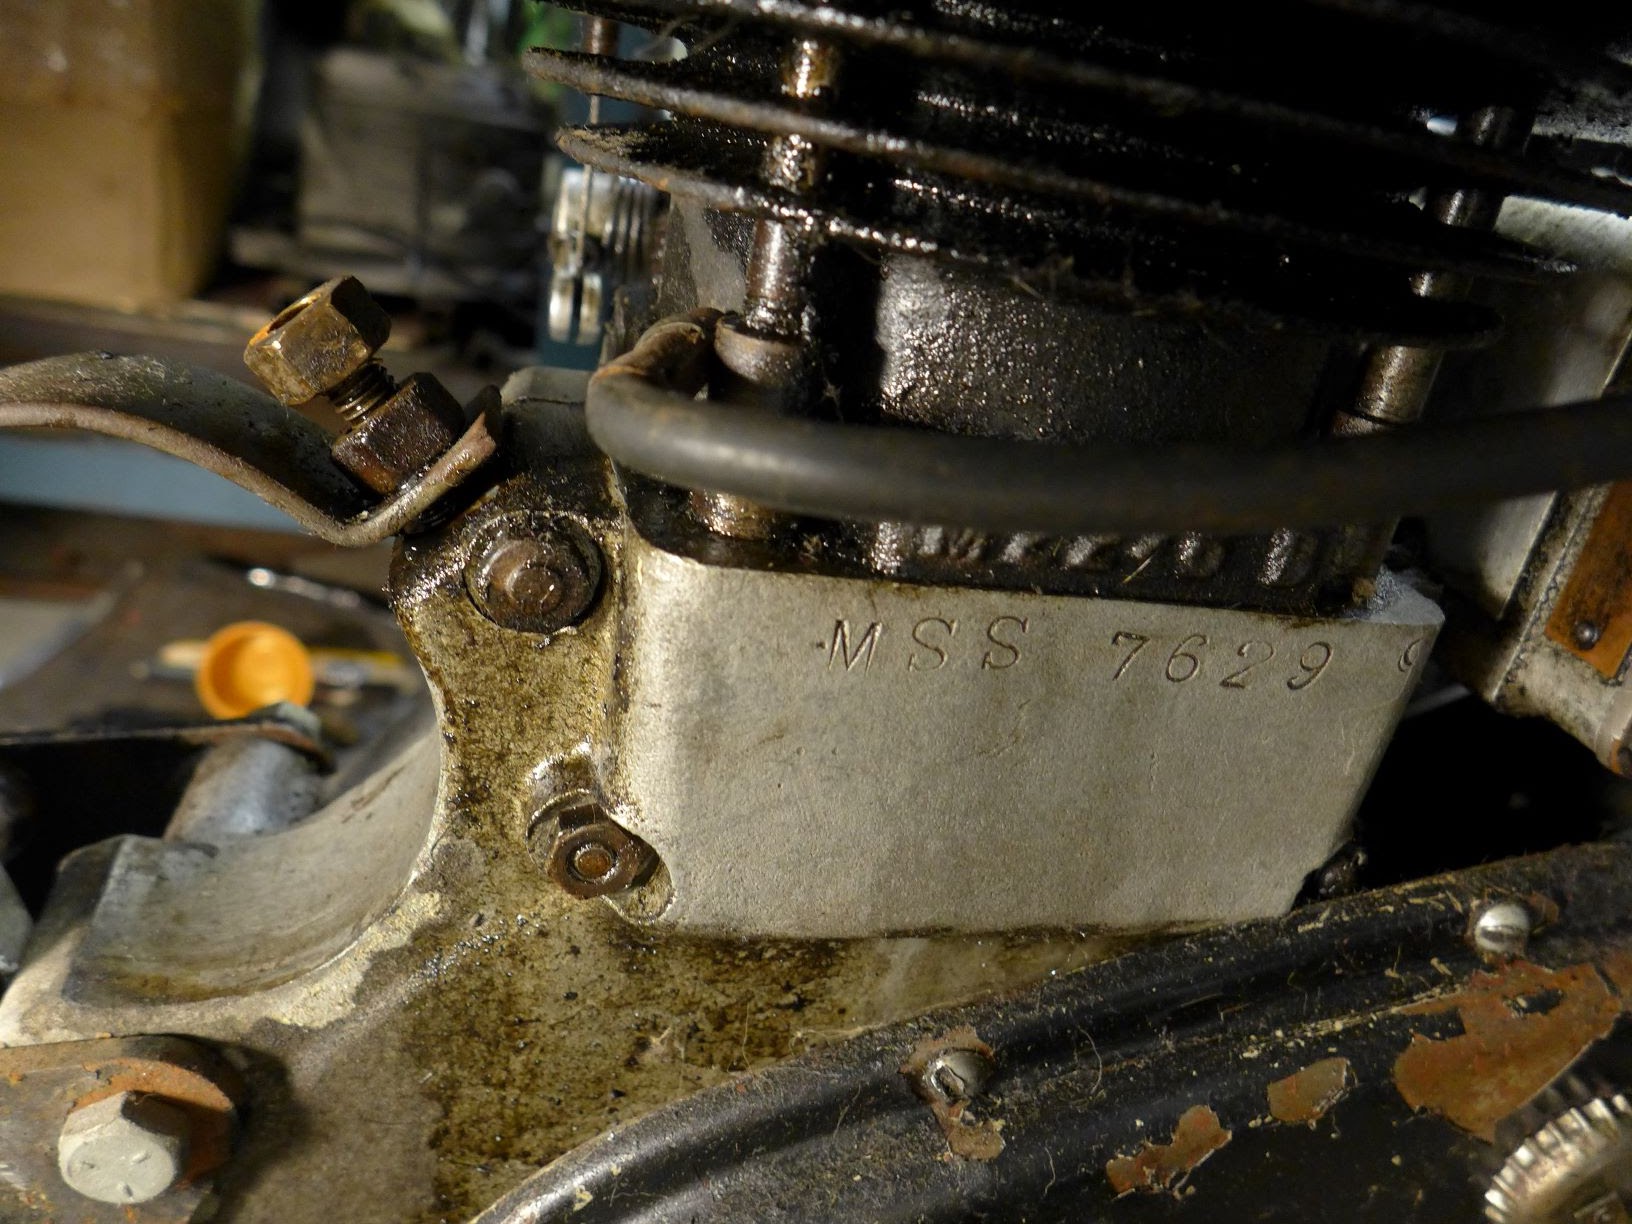
I've added a few pictures of the MSS numbers; frame, gearbox and engine just for curiosity sake. Its hard to see the frame number KDD 9940. On to tomorrows task to strip the forks and wheels.


Tuesday, December 1, 2020

A Velocette MSS complete

Inspired that Ed G. was back in the shop, I decided to have another look see at the 1947 MSS project.  Its one of "those" projects; every thing that might be ok, isn't. 

The biggest difficulty has been that its a complete bike. Complete is a funny word in this case. As is everything is completely worn out, busted or just bodged. When purchased, the Dowty forks leaked air. Within a few seconds after removing the air chuck they'd fall. So there was no front suspension except for the front fender on the sidecar lug. 

 Upon a more through inspection of the Dowtys, I found the frame was cracked on the down tube. It might have been cracked before at a lower spot. However that had been covered over with a patch and some welding. So this was a new crack right through the frame down tube.  But the engine was unstuck, the mag sparked and if it was provoked, might just fire off. What would be the point though if you can't ride it?

So it sat, and sat and ,sat some more until last fall when I had enough of a complete non-roller bike. It looked the part but was about as useful as a cinderblock in the dark. So the Dowty forks were torn down and apart. Just about everything on the forks is functionally obsolescent; tubes are worn, lower triple is cracked, brass spacers fell off years ago and are mangled to the death. bearings are all rusty, races are ready for the bin and a dodgy air valve. if you bump it, the forks collapse in a heart beat. With a super duper extra long valve stem cap the air now stays in. After a replacement of all the seals and a good filling of oil the forks can now hold a person and the bike up. And as worn as they are, they can go a few months before sagging back down it seems. 

Dowty forks have many small parts and seals

This summer, the forks began to leak oil. They stayed dry for about 6 months and then just began to leak. Seems the old solder joint in the base, where the lug meets the tube can't handle the air pressure? With a bit more time of observation its looking as if the front wheel is offset of the frame. Hard to really say though; is the frame more bent, the forks twisted or the spokes not correctly laced? One couldn't see this directly with the fenders on. Nobody like a stinky llama, time to tear it apart.

On one hand it would be great to get this bike back on the road. On the other, its complete as it rests. If you tear into it as stall, you run the risk of a basket case or worse. And this bike has it all going wrong. As things come off more and more is wrong.


the oil can be used as paint

not even sure where to start with this.


Hammer tite threads?

As things came off to get down to the frame a list started to present itself. The carb flange will need to be address, generator a full rebuild if possible, magneto is a given for a rebuild, respoke the wheels in the proper pattern, exhaust has no baffles, fuel tank is leaking, clutch slips, shifter is sloppy, chains are worn, sprockets worn too. Pretty sure the engine needs attention if its anything like the rest of the bike. good thing the battery died decades ago as the wiring wasn't up to the task and the horn just rattles internally. So the bike is complete; completely worn out!

Sadly, the stupid thing still looks good and the forks hold air now.