

Around noon time I called a local shop to see if they might be able to weld the frame; just clean it up and bring it down they said. They've been doing British bike repairs since the 80's, maybe even earlier. At the very least it would be a good thought to hear their thoughts on the frame. However, by the end of this post you'll find that it might need more than just a weld.
Before getting a full on, stuck in today; I also gave Ed G. a call for inspiration. Kinda like a double espresso shot to give you that extra motivation. Everything looks easy until you begin to overthink it. And with everything this old machine has to offer, the education is boundless for me to overthink. We talked about parts and cost; cost being a big issue for me, but getting the Velo on the road and out of Ebay is more important. Plus, I'd feel like a real heel selling this machine to someone that has eyes for it but no real knowledge of getting it back to health.
Generally I'd rather ride a bike than repair it. Wouldn't we all? However having some skills and a few tools to tackle most minor machine ills can allow for a lower buy-in budget to experience. This machine is beyond the tipping point; the full on challenge of repair. All of this will give me more skills to build a racer in the future anyways.
Am I up to cutting out and braising in new tubes? I've never braised, but I do have a torch set. So where do we go? If the road goes in the right direction I like to be more in tune with these older machines. A self sustaining process; able to keep it going. Its not a restoration but a means of keeping it working in a tidy manner. Back to a zen state if you will, maybe even a metaphysical thought process. If you know it inside out how can it let you down? Its difficult when you let the machine psyche you out.
So the first port of call was to use some 5f5 paint stripper on the previous repair. No need to be worried about the concours paint. Seeing what was done would help direct some ideas as to which way the down tube needs attention. After a few applications of stripper, it was evident this was a true bodge to keep it running. It looked as if it had a strip of metal to blanket over the welded section adding some support where there was a previous crack right under that casting. Cleaning the welding off the old tank casting will prove to be challenging. Ed G. mention several different ways to tackle this; cut the old casting in sections and un-braise it or in extreme cases, fabricate a new set of mounts out of tubing. After looking, I'm leaning towards fabrication of a new unit.


So clearly there is a problem with the whole down tube. As things progressed in the teardown, I find that the frame is also bent off to the left a fair bit too. But before anything can be done, the engine and gearbox need to come out. So onward ho! Most of the removal is straight forwards, generator off, oil tank off battery tray and the like. Keeping track of the bolts slows things down now but will speed things up later. Usually I will put the bolts back into the plates or locations they came from. Better still is wired onto a section of cardboard in which I've drawn or cutout the shape of the location. This works best when removing covers of any sort. A good thick piece of cardboard will last many uses.
 |
| The modified generator strap, not factory. |

 |
| Does this qualify as "safety" wire? |
While preparing to remove the primary case I recalled Ed mentioning to me in past conversations about the early frames and the foot peg lugs can be problematic. All the primary cover screws were accessible except for one. So maybe the primary stays on while the engine/ gearbox assembly.? At about this point I needed to give Ed another call for advice. Hopefully he doesn't have a punch clock near his phone! Ed had a trick that allows you to wiggle it all out; loosen the rear engine plates from the transmission and remove the rocker adjuster covers. I opted to remove the rocker box altogether after loosening the plate bolts.

As a note, the engine/ gearbox is heavy! I found holding it from the magneto body and the cylinder afforded the best leverage. But its no light weight. With the engine out, its clear to see that the frame is bent. More chores to figure out. 


I've added a few pictures of the MSS numbers; frame, gearbox and engine just for curiosity sake. Its hard to see the frame number KDD 9940. On to tomorrows task to strip the forks and wheels.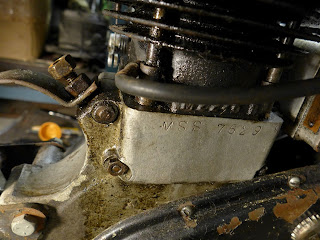


No comments:
Post a Comment