

Monday, November 23, 2020


Thursday, May 21, 2020
Mr. M's Honda Ruckus cont.


One of the previous owners added some netting to act as a package tray. Kinda looks cool but the unkempt zipties are a sure hand slicer. I rather like to trim them back smooth, it give a cleaner finish and less likely to jab you.


Found the carb, looks to be an easy removal. the intake tube, air box feed, two coolant lines, fuel line, throttle cable and two electrical connections; an electric choke and a TPS.
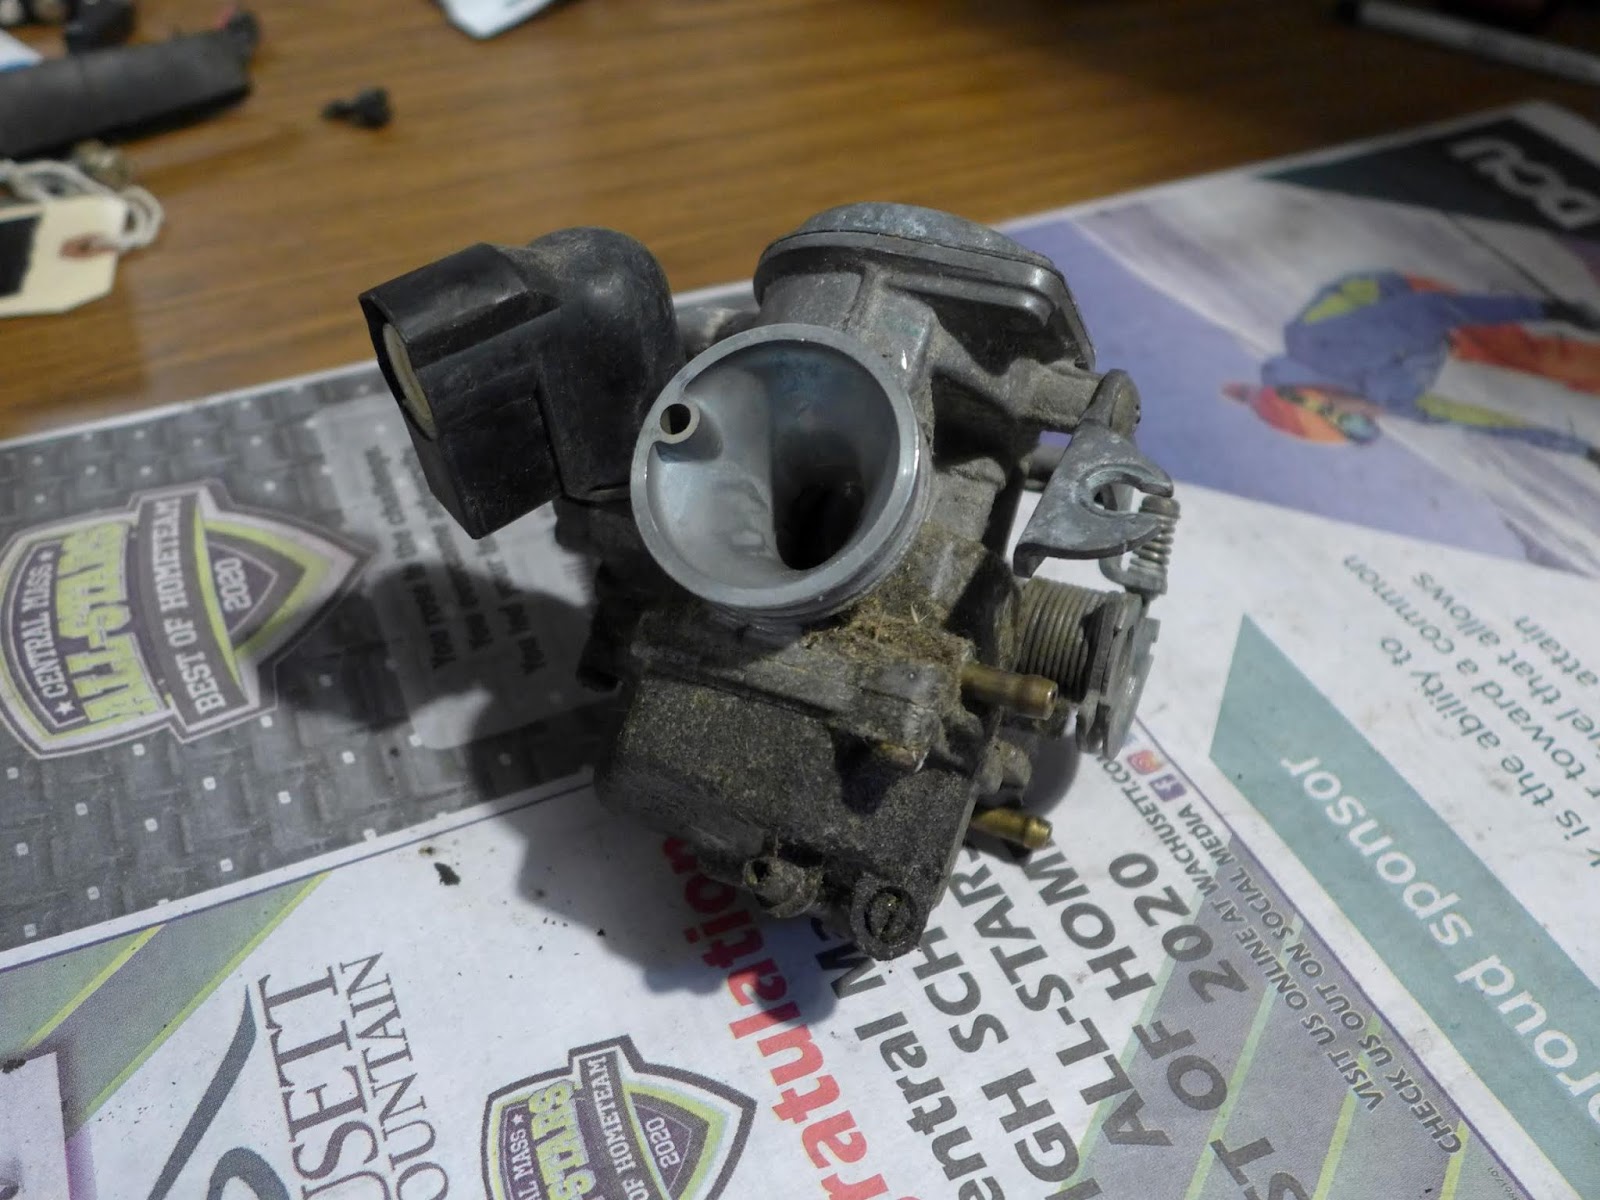
On the bench and under the light, its looking as if someone has already been here before. The float bowl screws~ are. Ok, let the fun begin...


All came out with modest work. One of the best things to do before trying to muscle them out is to take a round punch and flatten up the proud metal. Its much like peening over a rivet head, except in this case your pushing the raised edges back in. At that point you can hammer on the top of a philips head screwdriver both to shock the threads and reform it at the same time.

OK, this is NOT going work, a mangled main jet. The good thing is that jet looks to be clear. Not sure I'm gonna monkey around with this; do not want to break the jet body or tabs. Bummer to find this, but nice that its not broken completely off.

Currently as it sits. Mr. M is weighing in all the possiblities that the Ruckus has to offer. I rather like the option of different ways one could create seat/storage frames. Maybe even extra tools or batteries for a winch or spot lights. What a great base for projects! Love it, might need to get one as well!
Wednesday, May 20, 2020
Mr M's Honda Ruckus

It looks to be a solid decent machine and he got it for a reasonable price too. We'll give it a go though, fix any issues as they come along. At this point the its been sitting for a few years after the keys went walkabout. Most likely being a Honda the only thing keeping this from going down the road is the fuel system so we'll dig into that first. As we go along I'll update pictures an process


After a bit of fiddling about we were able to get the gas cap open. Not horrible but also not really great. As expected, the fuel had turned and a touch of water was on the bottom of the tank. the cap looks to be crusty but maybe it'll clean up well enough.


Saturday, April 18, 2020
Snow way!


Sunday, March 29, 2020
New uses for propane cook stove

Had another go at heating the cases. Took the old propane camp stove and added "C" clamps to hold the case off the flame. The first try, even with the water splatter method the bearing race stuck in and failed to drop the whole distance. Ok, reheated it and tapped the race back out. Gave it some time to cool the whole lot down before another go.

On the second go around I used a pyrometer attachment to the DVOM. When it got to about 288`f or so I grabbed the race and gave it a try. CLINK with a drop right in. Well ok then, this is moving in the right direction. After letting it cool about an hour I brought it back in for measurements.
Sunday, March 22, 2020
Velocette MSS shim battles continues

So I had at it and used the Roger Welsch; heat- beat- repeat technique. The verdict?- no love. The main race just would not budge. The first set was using a heat gun; now this works on BMW gear boxes almost all of the time. But then again , this is no BMW. so after three tries I moved onto a puller with heat. The object was to minimize damage if any. Still no love.
At this point I took a few hour break before I did (break something!). And back at it with heat and beat. still no love. So I setup the press and tried with more heat. Nope, not a hit of movement. Now I'm sure that there are a few of you out there that would have a better approach. This is what I had today and now.
My concerns were not to heat it so much to warp the case but the heat gun was not working. On to Propane. It did get things moving faster, but still no love. set it cool for a bit and get back into it later in the day. an hour later, heat the spice out of it... and there we has just a slight movement. then stop. More heat, more beat. some little improvements but this is taking WAAYYYY longer than needs be. I think of the old chap that broke his bike at the club race on Saturday and needs this for Monday morning. Looks like I'll be walking to work tomorrow.
After what seemed to be an eternity the race came out along with a set of destroyed brass shims.

After a conference over Marconi and Bell to those in the know it seems that there still was not enough heat. And I was ready to machine up a spacer for a drift to tap the race back in.

Well at this point the game is to play with heat, to see how much heat it takes for the race to drop in. And then reverse the process to make it drop back out. Once we get to that level-we'll give it a shimming. The golden turn around.
Saturday, March 21, 2020
Velocette Crankshaft endplay testing, maybe?

The simple process; place the crankshaft back into the case halves. Space the two case halves apart with 0.004 shim stock and measure out the end play. Any end play found is the needed shim at the main bearing race. The crankshaft should have 0.004 nip up or preload. Sounded simple enough... But what if there is no end play when you measure it?

Well, I don't have any convenient 0.004" shim stock. I do however have 0.006". And maybe this is where things could be going wrong. The thought was that 0.006" shim stock would mean that if the cases are nipped up and your looking for 0.004" , with a 0.006" you'd have 0.002" play as you lifted the cases while the drive side of the crankshaft was locked into a vise. The dial gauge would be affixed to the case in some fashion.

This was the mucking about that has taken months to get down to. Gathering bolts, cutting and filing the shims. Then making a simple bracket to allow the magnetic base of the dial attach to. In the club video it looks at if Dave attaches the dial indicator to the vise then takes the measurement from the case. The current vise in my workshop doesn't seem to be long enough to do as such. So will attaching the dial indicator to the case and measure the crank work? Dave also uses 0.004" shim stock to take the place of the nip up.

 |
| Set at rest |
 |
| heavy lifting on case |

After about an hour a thought occurred to me, that if .006" shim stock gives no to little play why not try thicker shim stock as re-check for play? ok, back at it
Subscribe to:
Posts (Atom)