Showing posts with label 1967. Show all posts

Thursday, January 7, 2021

1967 BSA Lightning tear down

With the iron MSS pulled down and awaiting the next step for repairs, the floor was clear to reprocess my dad's old BSA. He'd bought it as a basket case around 18 years ago. We had put it together; some new parts, some used parts and gave it a fireup right where it stands. And then it sat, dad got sick and the old Beeza sat and sat. Dad passed ten years ago and I put the bike on the back burner, mostly because there were many small details never completed; wiring, paint, and the usual run down tidy up of loose ends. 
So with a new year and a clear space, its time to help this old bike run again. But this time we'll see if it can get onto the roadways this summer. First chore is to tear it back down to the crank, recheck oilways, clearances and give it a clean up.


photo in the pushrod tunnel
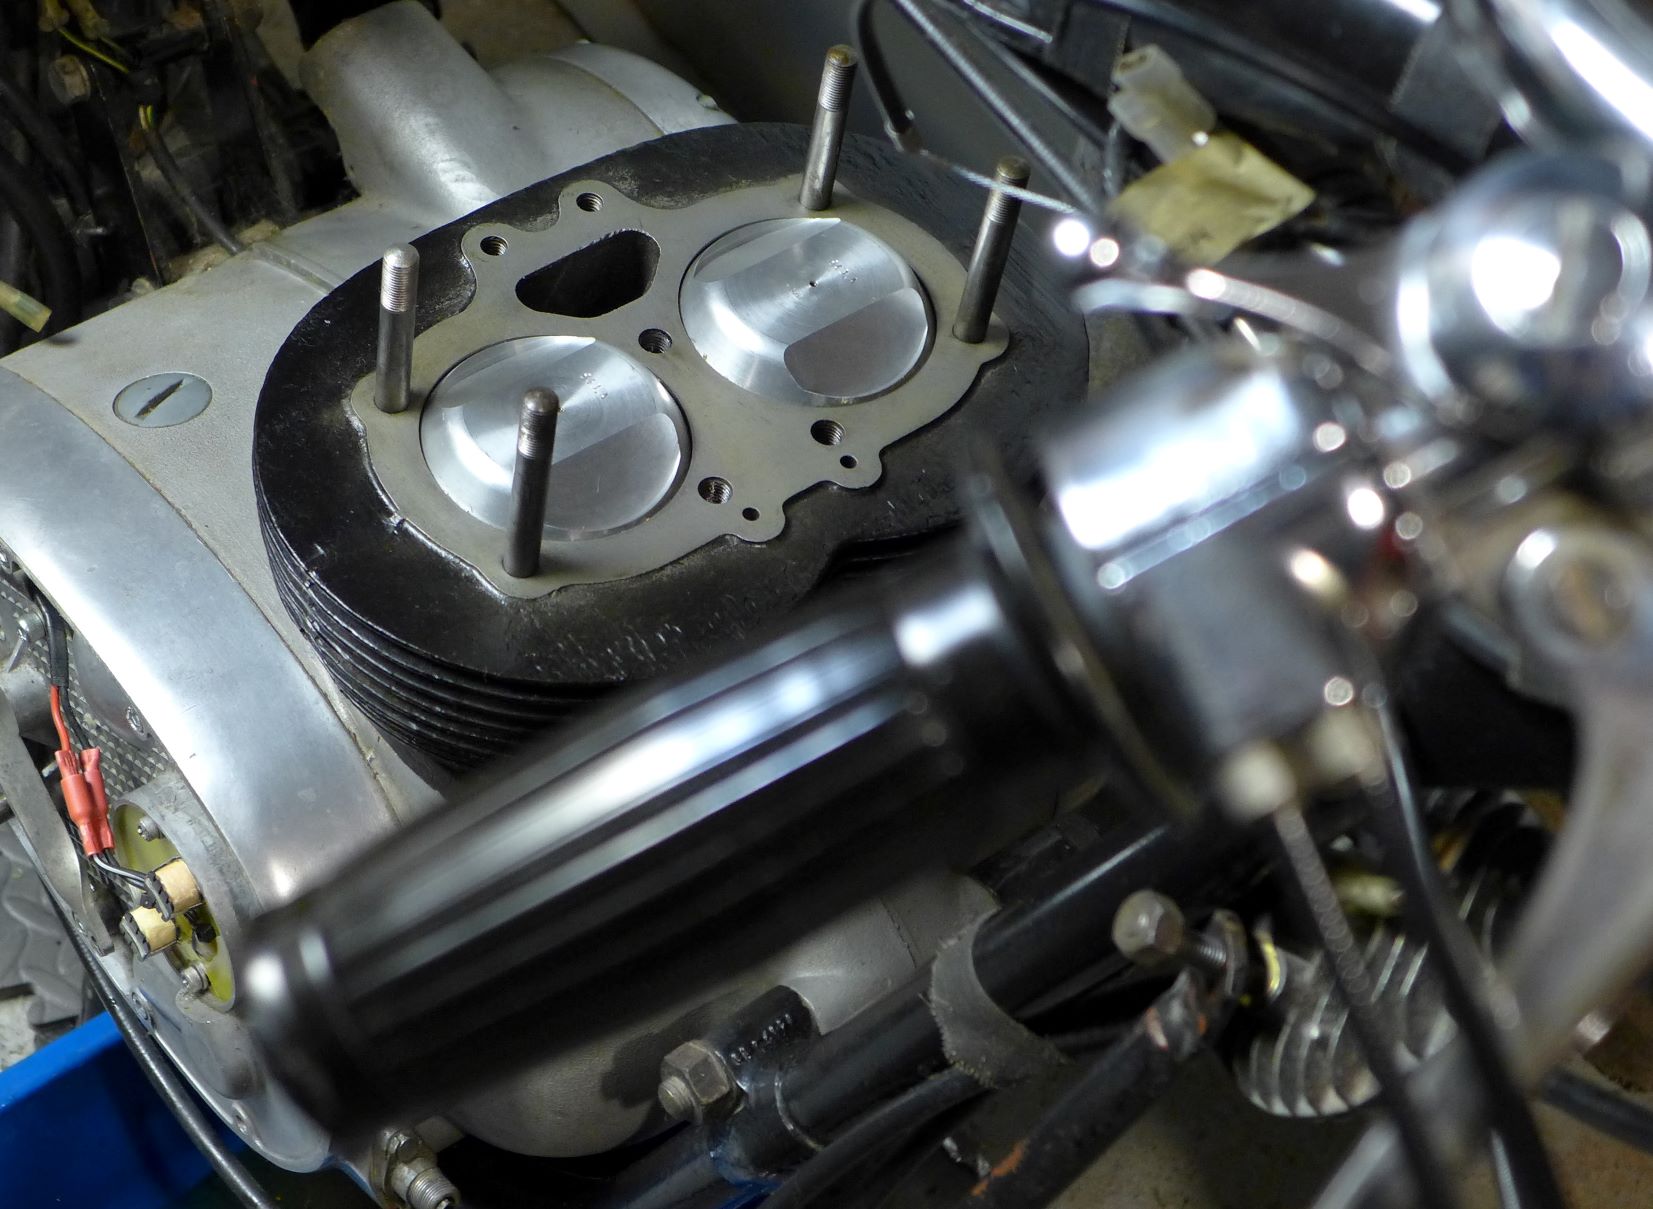
Over the period of  three days I took as much weight off the engine case to remove it from the frame. Dad has replaced the pistons and had the head reconditioned by Import Machine. everything still looks great internally. Only a few minor items will need attention.


Three days, down to the block and ready to split the cases. Time to find parts and suppliers.

Sunday, March 4, 2018

A little more Scrambling

  After a few days of doom and gloom weather reports, New England was still is on the map.  Fighting off the blahs and some depression, I got back into the scrambler.  The magneto was bolted on a few weeks ago, but getting into timing the engine , I feel is one of those events that must be experienced than got through. Timing is the moment that you know where the spark will build the flame wall. its the heart of all you ride on.
In the case of the 67 Scrambler, it has a manual advance unit on the Lucas Magneto.  The first step was to disassemble the old mechanism.  Most everything was wiped down with WD-40 then greased lightly.  The old cable end was formed to fit within the plunger.  I've kept it aside so as to make a replica at a later time. This type of cable end will mean the cable will need to be made with the adjuster housing in place.

The adjuster housing looked to have a fiber washer at the base. Not having the old one or one the right size, I came up with a simple method of wrapping 220 grit sand paper around a socket, then twisting a close fitting fiber washer onto the sand paper. With a little bit of effort the size was a perfect fit.

 It takes a bit of time, to set the timing. I'm always double checking each movement and adjustment.   The first bit was remember which way the engine spins.  Having made the mistake to timing a Velo on the exhaust stroke before, Its a good idea to removed the rocker box and check the rise and fall of both the Intake and Exhaust push rods to find which stroke the engine is on either the exhaust stoke or the power stroke; the power stroke is the one you want for timing.  Most of the Velos I have are happy with 38 to 36 degrees before TDC  (Top Dead Center) even with ethanol. After I'm comfortable with which direction the engine is spinning At that point I'll setup a degree wheel on using the positive stop method.
Not pictured, is the wire indicator pointing to the degree wheel. In this case, I used a coat hanger filed to a point. the Back end was bent into a 'U' shape then clamped down under one of the engine bolt nuts on the right hand side.  After the degree wheel is set, the magneto points are set to open at 36 degrees (full advance: advance lever in its resting position, or closed). I'll test this several times; both with the  advance lever in different positions. When the cigarette paper lightly slides out of the points, it should coincide with the pointer on the timing wheel.

While the cover is off I'll give the rocker adjusters a gap check.
Next step will be to begin cable making for the rest of the controls.


Thursday, January 21, 2016

Welcome to 2016! Its been a long and rather ugly time since -  March 2015.  Didn't much like last year, glad it went by fast and its over! So what's on tap for this year?A  pair of machines have appeared into the fold needing some re-commission; a 1971 BSA A 65 Thunderbolt and a 1963 Matchless G12 (standard model- no magneto)
1971 BSA A65 Thunderbolt 

1963 Matchless G12 
If my mind works faster, and time permits I'll add more of the details about both machines. The Matchless is just about ready for its first fireup since 1979. Currently she is awaiting my going over the bits that came off during the re-commission service and having all new oils filled.

The 1967 Scrambler is also on its way. Though there still is a fair bit to do; forks need to be address, wheels are a question, no serviceable carb as of yet (10TT9 anyone?).   But the Engine is ready, and the transmission is well on its way.
1967 Velocette Scrambler, as new
1967 Velocette Scrambler with engine and gearbox back in place
If the 2016 weather (winter into spring) isn't too brutal on the body and mind I'm hopeful to hear these three machines fire up for the first time in a long time.  Here's to looking forward!

Thursday, March 20, 2014

Velo Scrambler progress

After a brief phone call with Ed G, I got enough energy to dig back into the scrambler project. That, and the Norton project has come to a short holding pattern.  the last few things to get into on the scrambler are the broken screws on the oil pump, check the main bearings condition and open the gear box for inspection.  with all of theses the engine needed to be pulled.  I needed to gather thoughts as far as approaching the oil lines which snake around and behind the frame. As simple as two oil lines and a vent tube are; they were well convoluted.

Once the oil lines were well documented, I could get onto removing the primary drive case and clutch unit.

Here is a detail of the output/input of the transmission including the 'frying pan' throw out minus the bearing that rides within the gate. I rather like the design, its very simple and works well when all the bits are in good nick.


  Here lies all the mystery of the Velocette clutch;  the top section with the four large holes threads onto the input shaft the the transmission and the large threaded ring on the bottom will thread into the clutch/chain wheel unit at the cover plate.  the top unit should be nipped up tight against the springs and the bottom is where the clutch unit is adjusted.   The threaded ring rides on three pins. these pins slide through the chain wheel body and rest on the throw out bearing in the 'frying pan'. The threaded ring is threaded into the cover plate until it touches the pins. If it is threaded in further while on the pins, the cover plate is moved away from the friction material causing slipping as there is no way to force metal into metal.

When adjusting up a Velo clutch, disconnect the cable and thread the ring at the clutch in until you feel a slight slip on compression while operation of the starter lever and only just slip. At that point you can re connect the clutch cable; there should be an adjuster inline of the cable housing, wind this adjuster to make sure you have extra slack to start the whole adjustment of the cable housing before connecting the cable

Connect the cable to the hand lever, then using the inline adjuster, remove any extra slack in the cable housing. The more time spent feeling the proper adjustment of no free play without over doing it,the better. Make sure to move the cable about and double check that you've remove any slackness that was added while the cable was disconnected. Do not wind the adjuster so tight that you need wrenches.

Now the final adjustment is carried out at the clutch;  the threaded ring is wound out and as this is done you should feel free play coming back to the hand lever (with light pressure) remember the three pins, as the ring is wound out they now gain room to move. The adjustment is complete when there is about 1/8 inch gap of free play at the lever. The whole reason for this 'process' is that Veloce had gone to great lenghts toward making such a thin clutch operate in such a small space;  the adjustment is right on the edge of motion for a slipping action. It is a refined engineered device with almost pinpoint accuracy.


  I had to take a few attempts at removing the oil pump.  Lots of heat is needed, its quite an interference fit.

Sunday, January 5, 2014

More snow. more time for motorcycles

Kept on procrastinating this past week even though there was time to play with the machines. Each time I'd get into the workshop there would be some other small detail that needed to be address first.  Papers needed sorting, a rack need to be setup and hold parts and just about anything that could get in and break the focus - did.    
The head got sent out to Ed G. for  evaluation on the guides and seats. The mag followed suit for a re-gauss. The mag bearings cleaned up very well, so that was a good thing.  But a better examination of the forks found that the upper triple clamp has a half inch crack directly in the middle.  Not sure whether I can find a set of good triples or come up with a different front end.  Prior to my pulling it apart the previous owner said it was fitted with a Ceriani front end. Could be the Ceriani was a replacement due to the crack....   The triples had been chrome plated in the past, maybe hydrogen embrittlement? who knows.. 
With a little more dancing that was expected due to a non- standard chain case bolt fouling the frame  upon removal, the Chain case open easy enough.  The gasket was quite dry and the felt o-ring that rides over the clutch unit was missing.  All the engine bolts except the upper rear most one have been removed.  After the oil tank lines are documented for routing the tank will come off and the engine can then come out.  Gotta get my act together if its to be ready for this spring.

On New Years Day the Norton was dropped off.   With it now in the shop I can give it a better going over.  A few small things here and there; missing timing cover bolt, battery is not very happy and the shifter needs to be address.  Mike S. will be coming by to give me a few pointers and I've called out to other Norton fellows as well.  More learning curves to go and get onto. 

Thursday, December 26, 2013

Take it apart, put it back together

Having a few days free due to the holidays can help get things out of the way and let the mind prepare for the spring season.  On the MSS the headlight stopped working on both the high and low beam at the end of the season.  The MSS winters on the pathway to the basement ice box and each journey brings forth the reminder to 'get on to it' for spring chores.  
After giving the kick starter a shove to change the piston set I got onto looking at the bulb. Both filaments were ok which got me to believe that there were gremlins in the wiring.  Though the headlight harness connections needed a tending to no gremlins were found. It seems as if the bulb had the short circuit within the base. 
A few searches on the interweb pulled up either bulbs of faraway lands or exorbitant prices; I'd converted the MSS to a 12volt Halogen but wanted to retail the original British Pre Foucs base.  Since the filaments tested fine, it seemed that all one had to do was de-solder the base and re-solder.  This all worked out just fine but a cool discovery was made...  I could use a inexpensive H4 bulb of the same wattage, remove it from its base and solder it into the old BPF base if need be.  A good thought if one was to be stuck on the side of nowhere and needed to re-create the wheel in 3 hours. 
later in the week I dug back into the scrambler.  The next chore to tackle was the rear axle.  I'd been soaking the outer bolt section for a few days.  With a socket tapped on and a large breaker bar, the axle shaft broke free and was able to be worked back and forth until it had smooth rotation.  The six nuts that held the hub onto the brake drum  were stuck. With a different approach; compressed air and an impact hammer made short work of them.

The magneto had to come out so give grips could be used on the lower head bolt socket.  It generally came apart easy to reveal more work will be needed.  Almost no polarity was felt in the body and the grounding brush was MIA.
On the head side of things, the valve guides are a tad sloppy.  This caused the more wear on the seats than I would have liked to find.  On the whole, the heads really need a full service but having a seat cutter on hand helped to having a go at it.  the exhaust was very much out of round and extremely pitted.  Now educated-  there really is no point it trying to cut back the seats with sloppy guides.
Not able to find a valve grinding machine locally and well knowing this needs fresh valves, I had a friend cut the valves on a lathe.  After using some bluing on the faces they seems not too far off.  A quick run with some fine lapping compound they were good enough to see if some compression was restored.
With the old head gasket as it was, everything was put back into place and ready to kick over.   The valves needed a minor adjustment and the compression gauge installed we were getting a bit or resistance and 60psi on the meter.  In fact, the resistance was as good as my other Velos. If was a bloke in England, knowing well on that the machine needed to be ready for work tomorrow, it would have been ready to go.  But the head needs better service and a more professional person to view the seats.
Ready for compression test


Removing valves again

The last thing for the day was to pull the barrel and piston. I'd been both looking forward and holding off on this job.  Not wanting to disturb the rings and allows foreign matter into the crankcase I'd been holding off removing the barrel. But there probably is no better time to visually inspect the piston and barrel. The plus would be to inspect the conrod feel and play.  So far everything looks and feels way better than the head.